How to Make My QR Nicer for 5 mins?

Don’t know about you but I personally got sick with materials that say: “QR codes are useless!”, “QRs will ruin your marketing campaign” or “Why QRs are doomed?” For all these guys that “hate” them there are two options – they either don’t know anything about QRs’ full marketing potential or they simply don’t know what they are writing about. If used properly, I am putting accent on PROPERLY, QR codes can become a real magnet for customers. Again I am going to refer to the 3D QR in Seoul that becomes readable only between 12 and 1 p.m. thanks to the specific angle of positioning and the sun light. Truly interesting and attractive for the users. Also if you don’t know what is QR code read more here.
On the question: “Is there a recipe for a successful QR campaign” there isn’t one sided answer. The factors are many and different but among the most important ones is the design because it is the design that makes the first and most important impression.
Many people write that QRs seem strange, even alien, and that is what discourages the user to scan them. As you might know Quick Responsive codes have become a really big thing for Mobilio mainly because of our product – the QREncoder. We even have a few articles in the blog, devoted specially to the QRs and how they affect us – LINKS. In this context I decided to create a small tutorial which demonstrates how easy is it to make a code beautiful and nice-to-the-eyes without even being a graphic designer. I wonder what would say the ones who still claim that Quick Responsive codes don’t have any future because they are “small, ugly, black-and-white squares” after reading this article or watching the video. Behold the combination of beauty and great functionality described below in pictures, text and video.
How to make my QR nicer for 5 mins?
Something very important that should be taken into account before starting to customize is the error correction level. There are four: L, M, Q and H where in H around 30% of the code can be lost and it still will be readable. To put it bluntly if you are planning to erase part of the code and replace it with the logo of your brand, like in the example, then put the error correction level to H.
Furthermore you will need an adequate graphic editor – my choice was Photoshop CS 3 but any other will do a good job too.
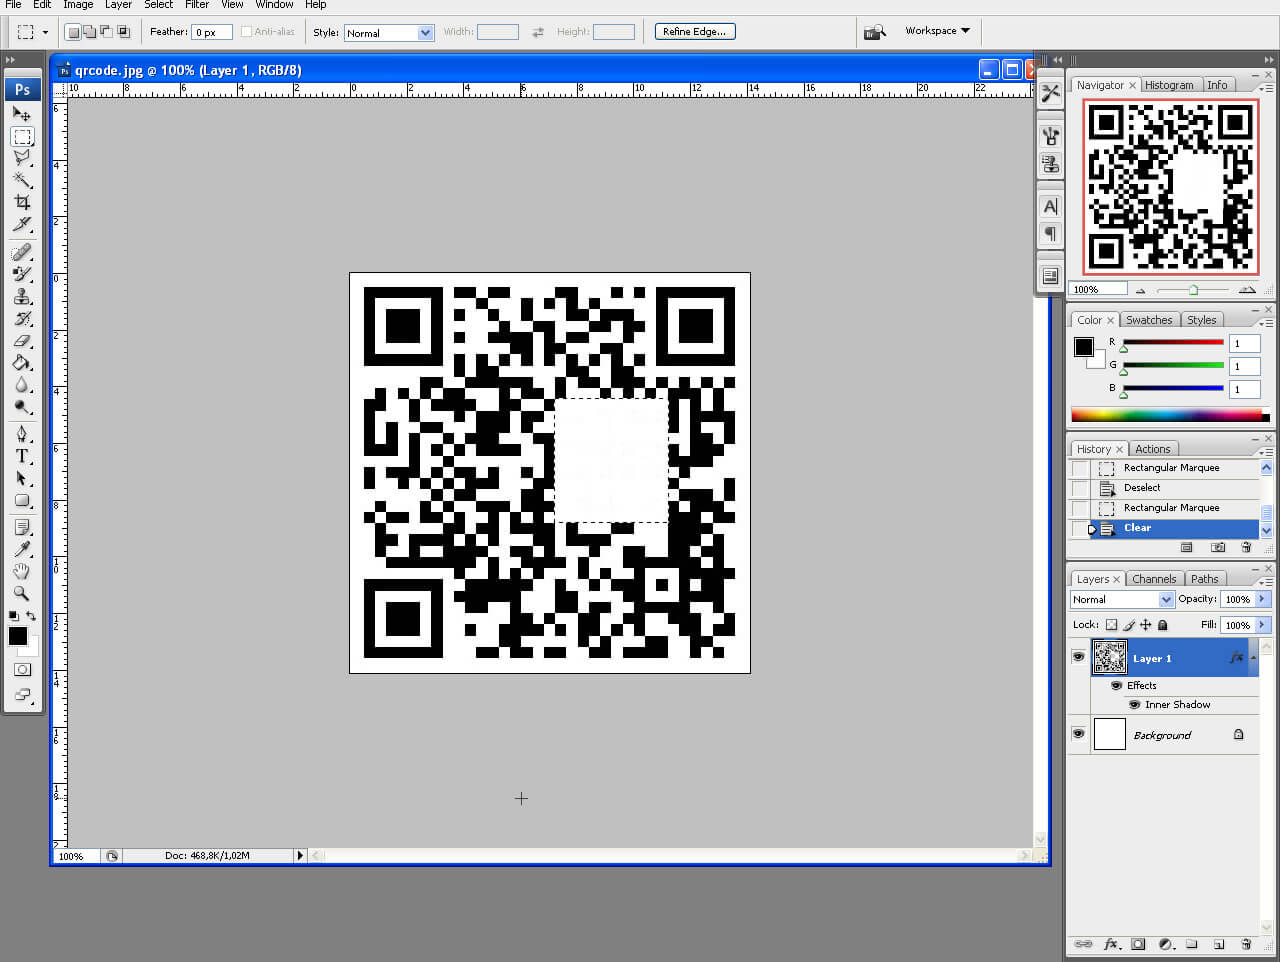
Step 1: Make some space for the logo
We begin with making some space for our brand logo in advance. If you won’t include any additional pictures/icons in your QR skip that step. Take into account that the imported image should not be too big, because bigger images would mean more of the QR being erased and when the “more” becomes more than 30% the final result might be beautiful but useless code.
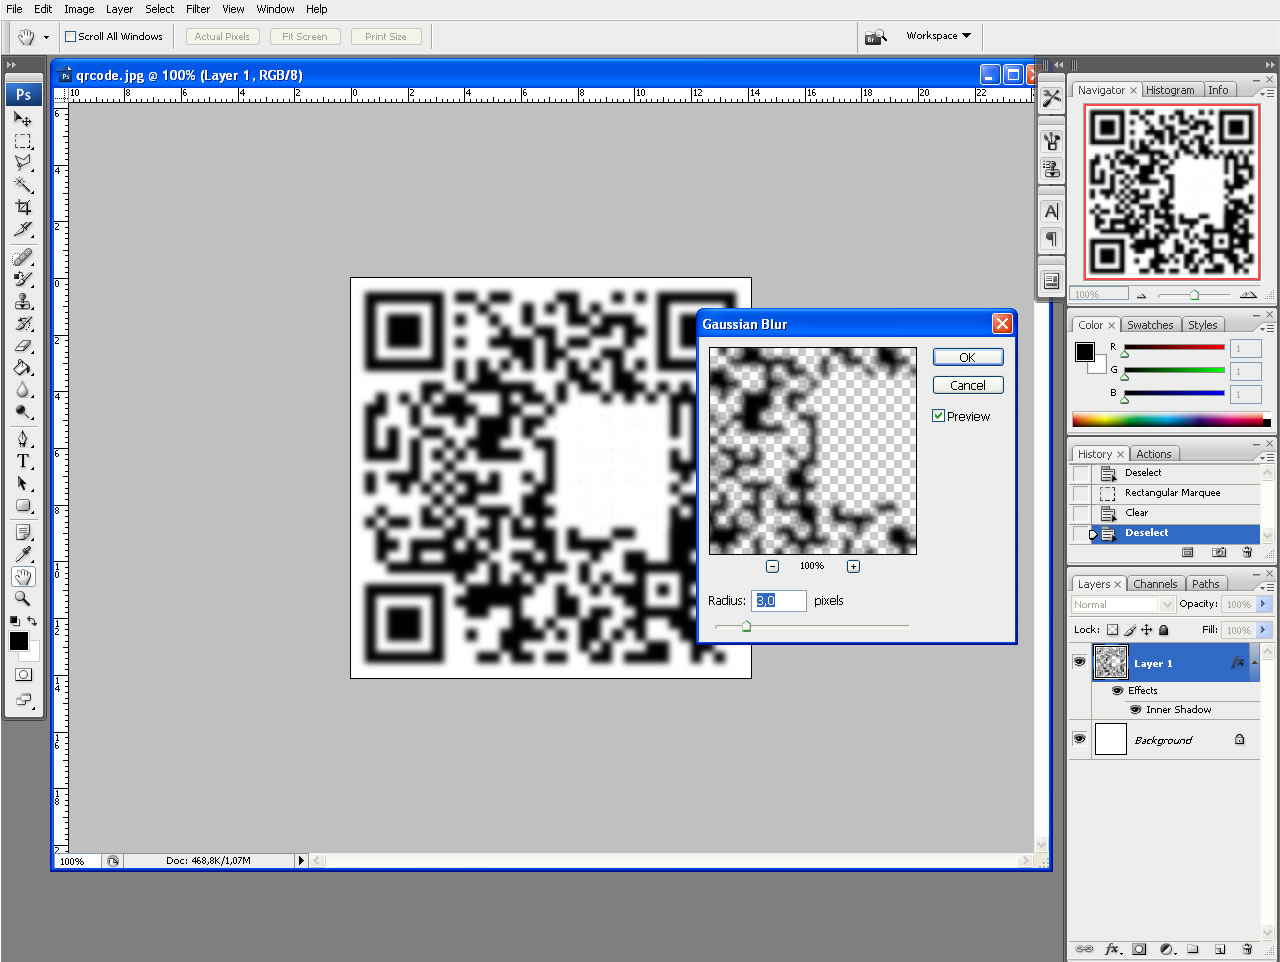
Step 2: Lets soften these edges!
After the erasing let’s remove the ugly-looking edges. First blur the image with any of the Blur types. I personally prefer the Gaussian Blur but being creative and experimenting is not a bad thing.
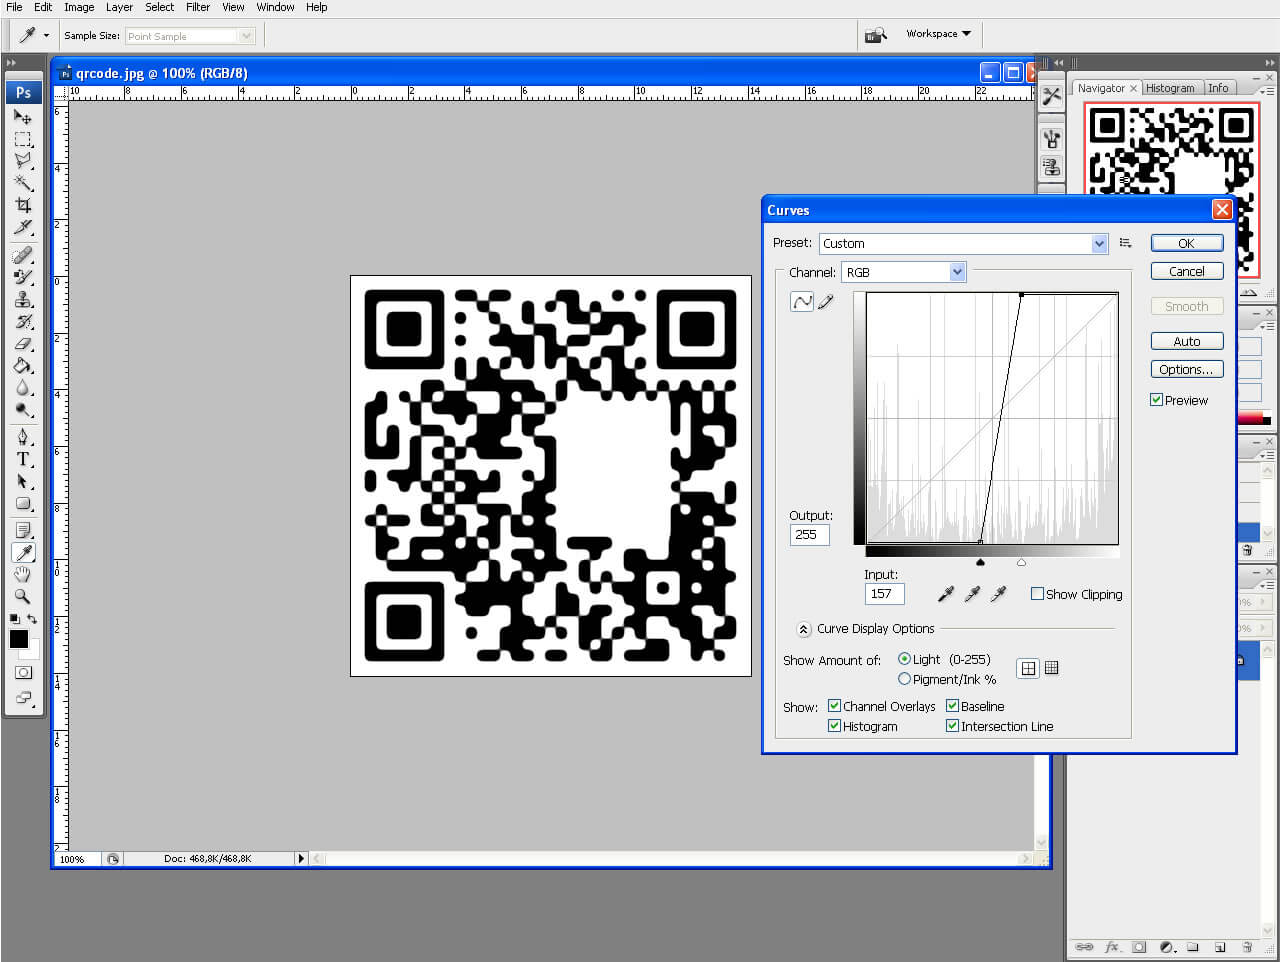
After the blurring we need to make the QR a little bit sharper and clearer but still to keep the soften angles. This will happen from Image->Adjustments->Curves. From the window that pops up we adjust the clarity of the picture. When finished with step 2 you will definitely notice the difference in your QR from before and now.
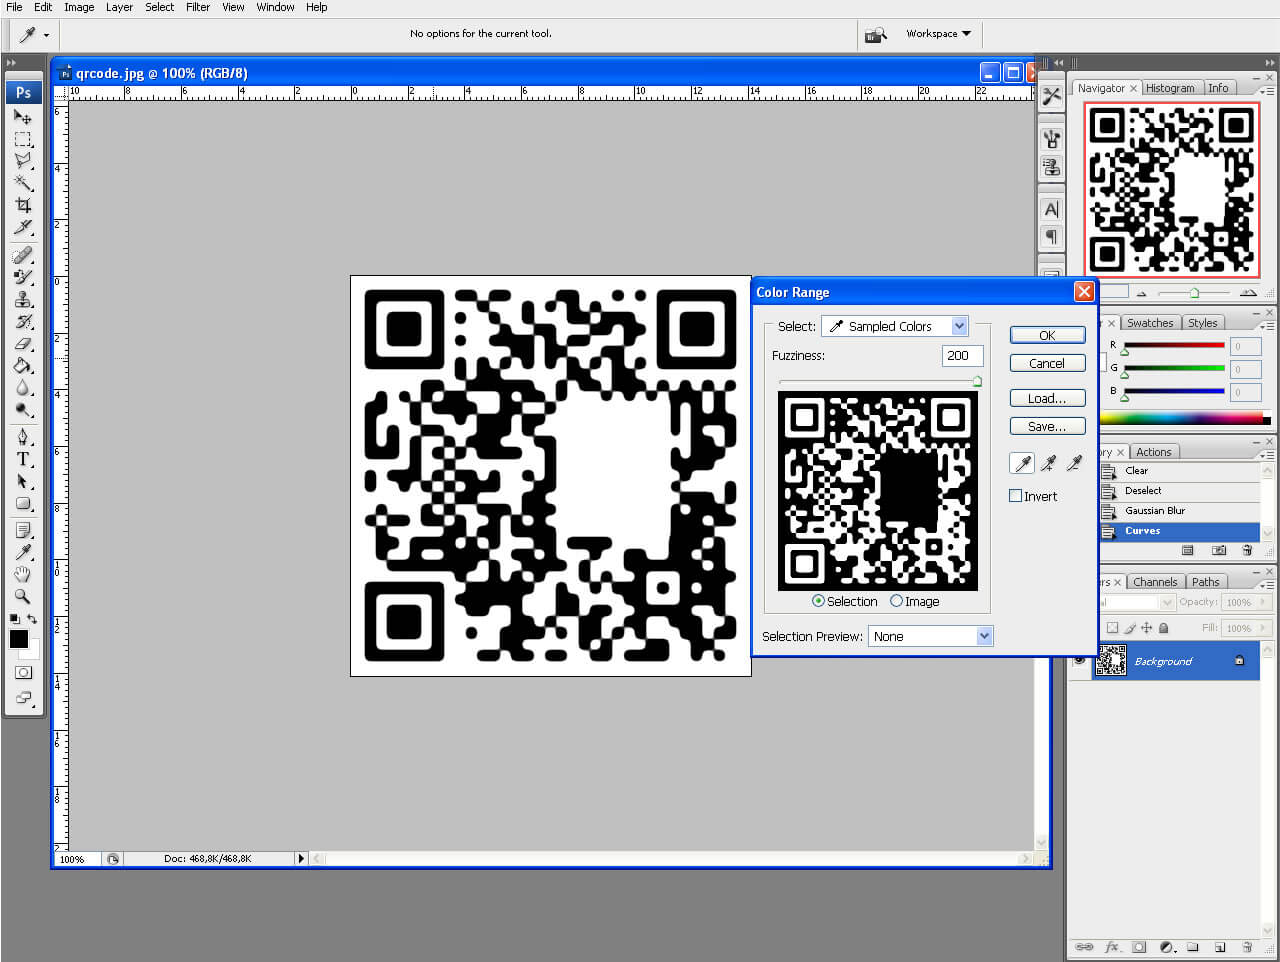
Step 3: Black is just not my style..
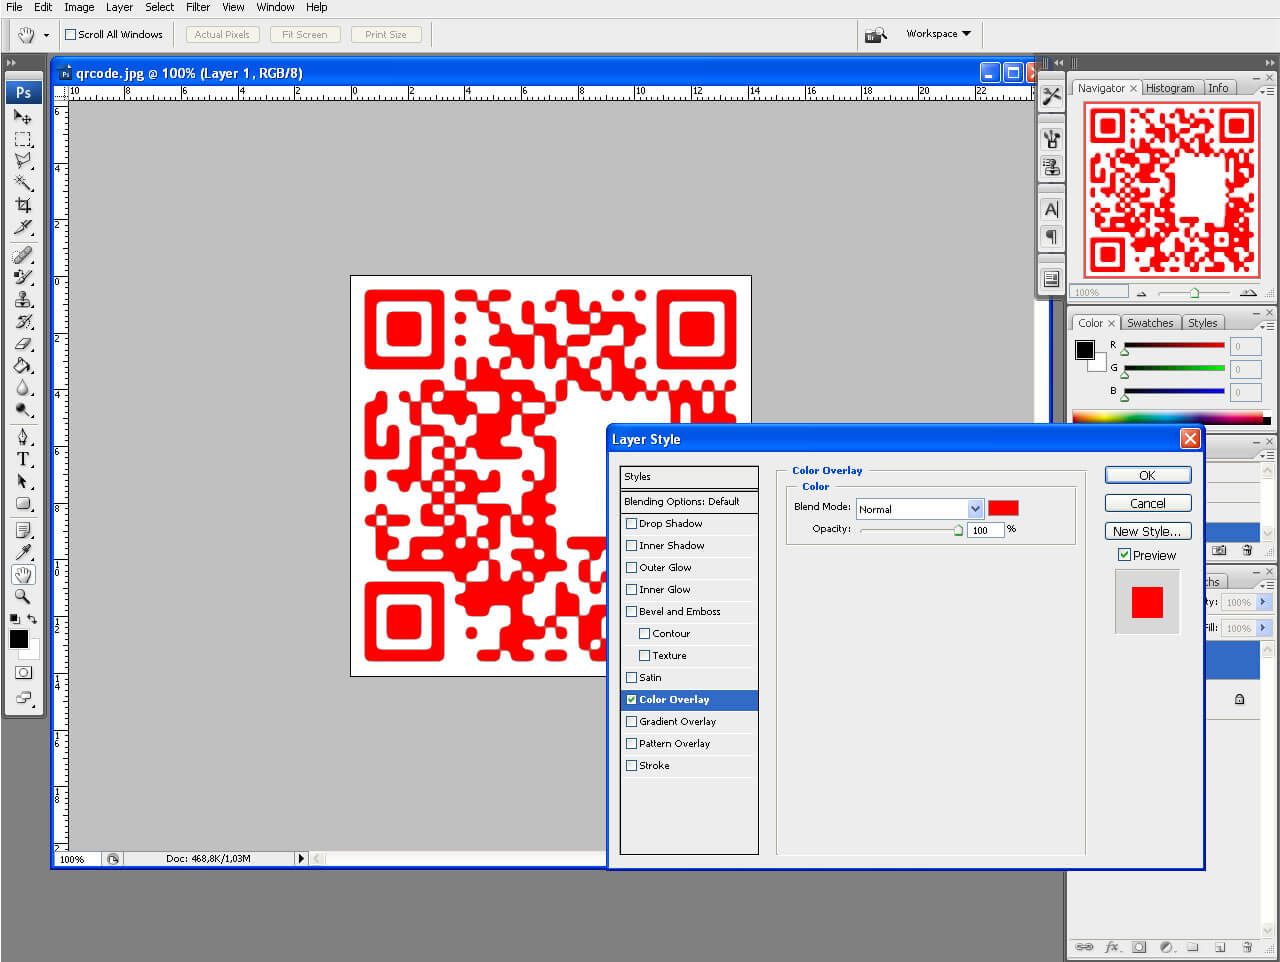
One of the options is manually to select all the black patters with the wand or to paint them separately directly with the bucket tool. Of course there is much faster and easier way. With Color Range from the Select menu click somewhere on the black pattern in the image, not in the Preview window, hit OK and it is all selected for you. Now in order to make it editable we will place our selection in a New Layer via Cut (short key combination – Ctrl + Shift + J). Then with right click on the new layer we enter the Blending Options and from Color Overlaychange the color with the desired one. From here you can also add shadows, glows, bevels, etc. but be careful with their colors because sometimes they make the QR more difficult for reading by the scanners.
Step 4: Branding the QR with the firm’s logo
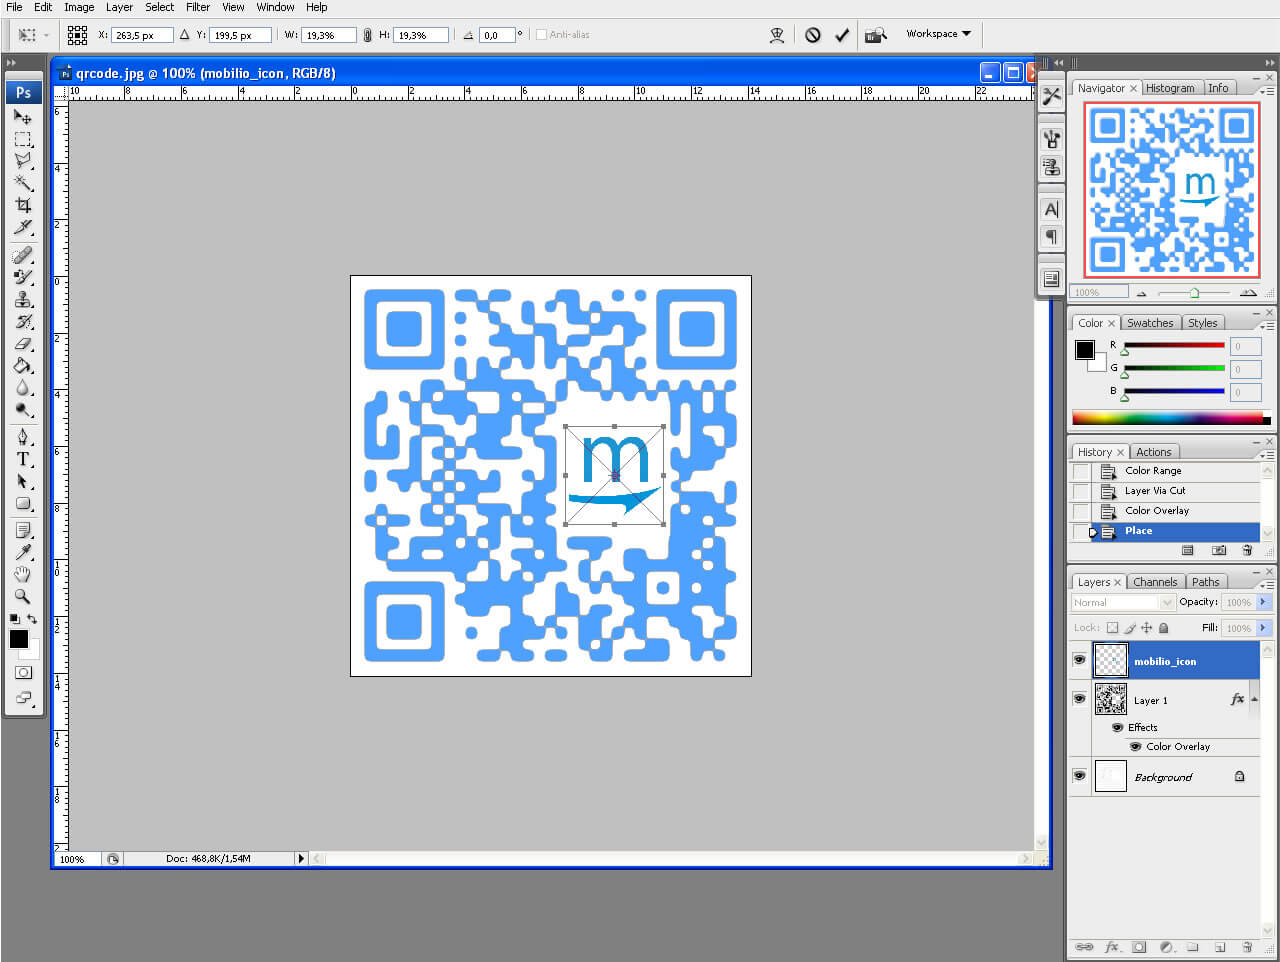
This step again can be skipped but if you have gone through number 1 then you will do this as well. Place the brand logo, do the necessary scaling and place it in the hole that has been cut. Some color adjustments might still be needed but pretty much that is all. The result is not quite a state of the art but it is at least something that can be done by everybody, no matter if their Photoshop skills are profound or just basic. With more experimenting some really good designs can be achieved.
Step 5: Test A LOT!
Test A LOT before actually putting the customized QR into use. Mistakes happen sometimes.
Let’s hope that more and more users will start customizing their QR codes and that statements of the sort “QRs are an eye-sore!” will remain in the history. Creativity, combined with enthusiasm and designer skill can end up in a QR that will undoubtedly catch the attention of your customers. If you take a look at one of my previous articles you will see some examples in which, believe me, the last thing that the user might think of is “What an ugly and inappropriate use of QR codes!” Let me know if the tutorial has been useful to you in the comment section below. I am open to any suggestions, recommendations and remarks. If you like this tutorial, perhaps you will like and “How to use QR barcode in Adobe Photoshop“. Enjoy! You can find Mobilio’s QREncoder on the Mac AppStore and download it for Free.


