How to use QR barcode in Adobe Photoshop

In this article I will show you how to use our QR barcode generator and Photoshop in order to insert QR barcode in sticker, poster or business card. The QR generator is an application for Mac OSX that can be downloaded for Free from our website. Using it you can produce fully-functional QR barcode. There are two versions of the QREncoder – Free and Pro. The Adobe Photoshop is a graphics editing program. It has a lot of features and now I am going to show you how to use them together with QREncoder. Probably for most of you it is not so easy to work with the Photoshop but I will help you with a few simple steps “How to use QR barcode in Adobe Photoshop”.
To begin with we have to generate Quick Responsive code with our QR generator
1. First you have to start your QREncoder. Then select from the content menu, what type of data you want to encode. As you can see, I have chosen URL. After this input the content in the edit box. If you want you can change your printing scale, error correction level, the color of the barcode and background and also you can make the barcode to be Micro QR. You do not know how to do these things? Watch our video tutorial about QREncoder.
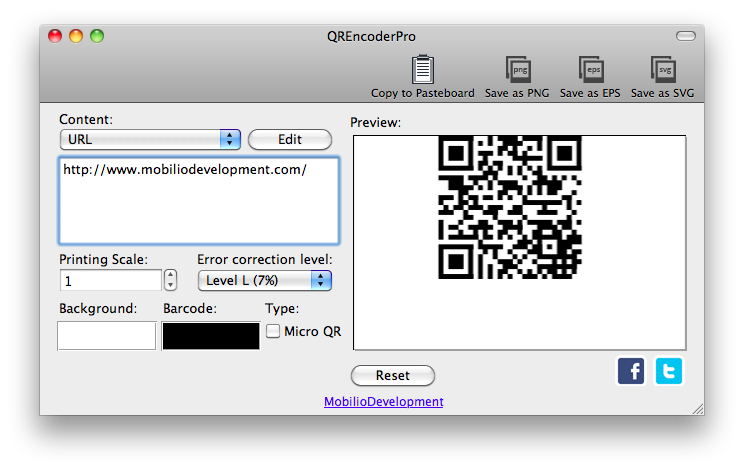
This is how The QRENcoder looks like. My QR barcode is ready.
2. After generating your Quick Responsive barcode and selecting the features that you want to be applied to the barcode, you have to save it in order to continue. You can save it as *.png, *.eps and *.svg. I am saving my barcode in PNG format. You have to write the name of the barcode and hit “Save”.
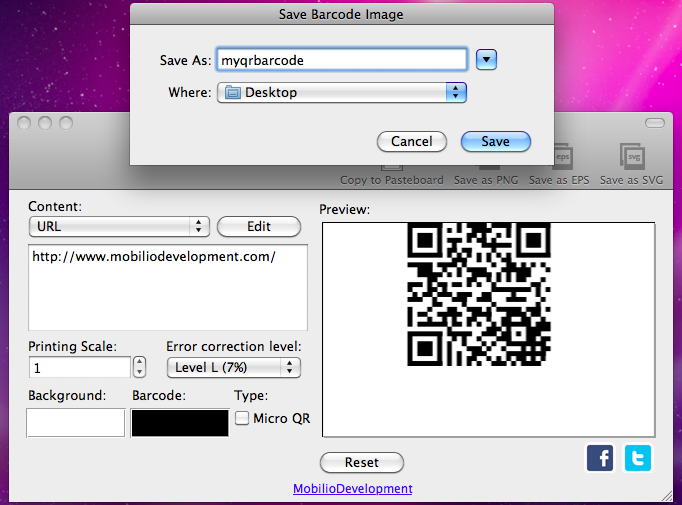
After generating your QR barcode, you have to save it.
Now let’s start up the Photoshop and start the process of inserting the Quick Responsive code
3. Now you have to start your Photoshop. Here I am using Photoshop CC, but you can make the whole process with all versions of the Adobe Photoshop. After creating a new file and opening image as a background you have to select “File” from the Menu. Then select “Place…”.
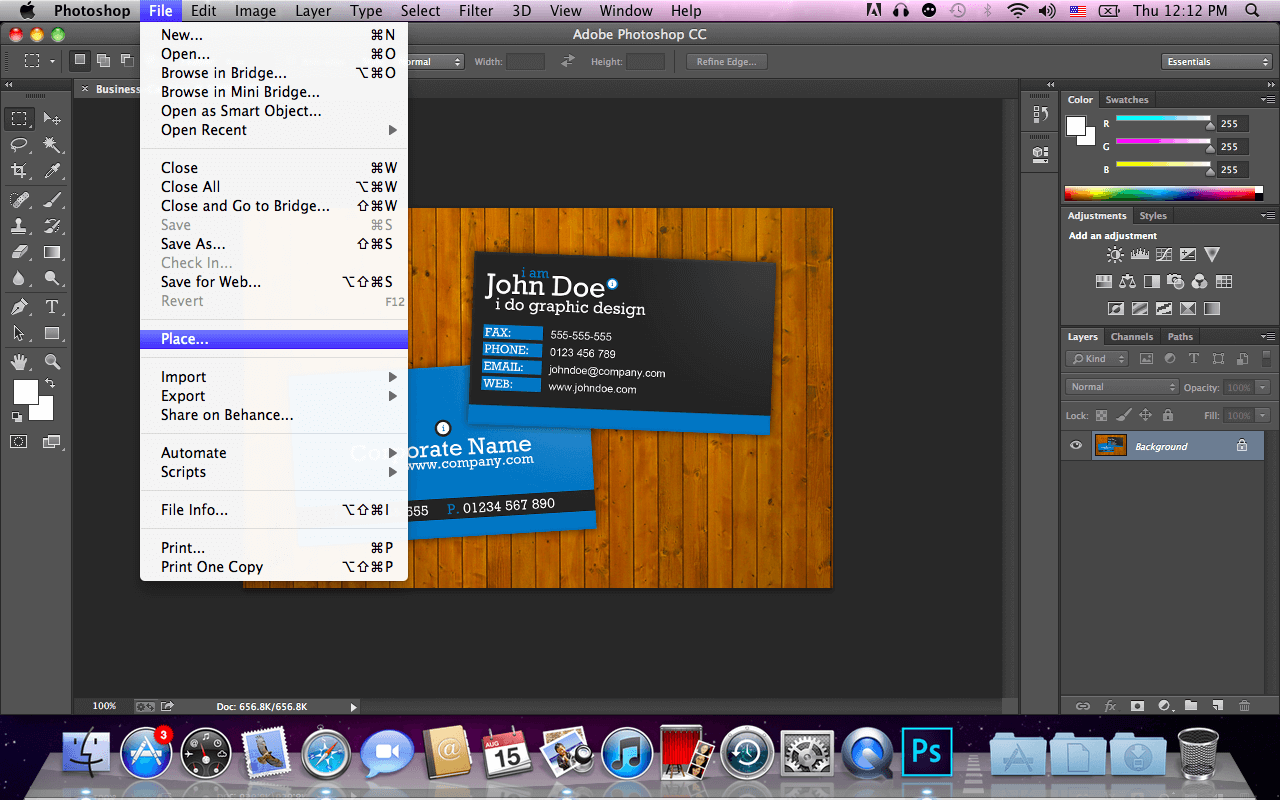
Select File -> Place
4. Here you have to find your generated QR barcode, select it and hit “Place”.
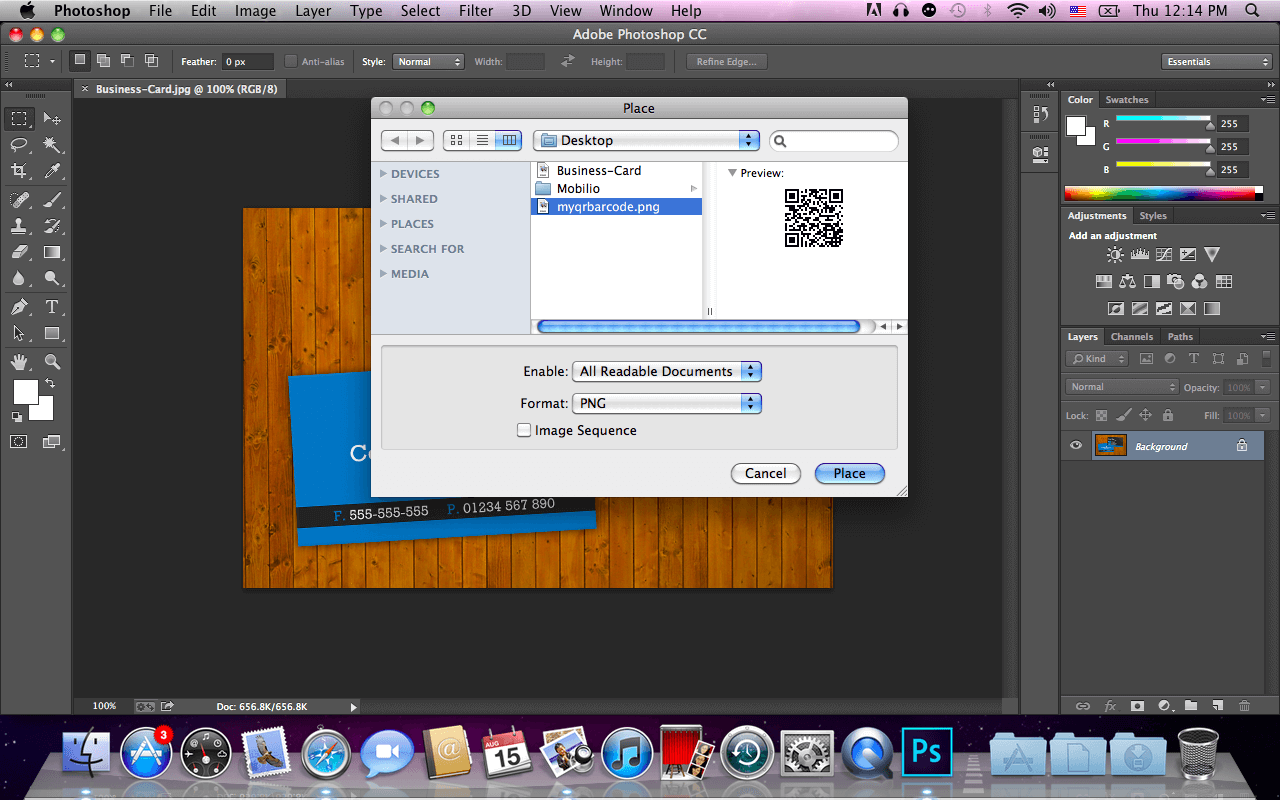
Find your QR barcode and click “Place”
5. This is how it looks like after placing the QR barcode on the image. Now you can rotate it, resize it, change its color or just place it on the perfect place for you. Read more about “How to make my QR nicer in 5 mins?“
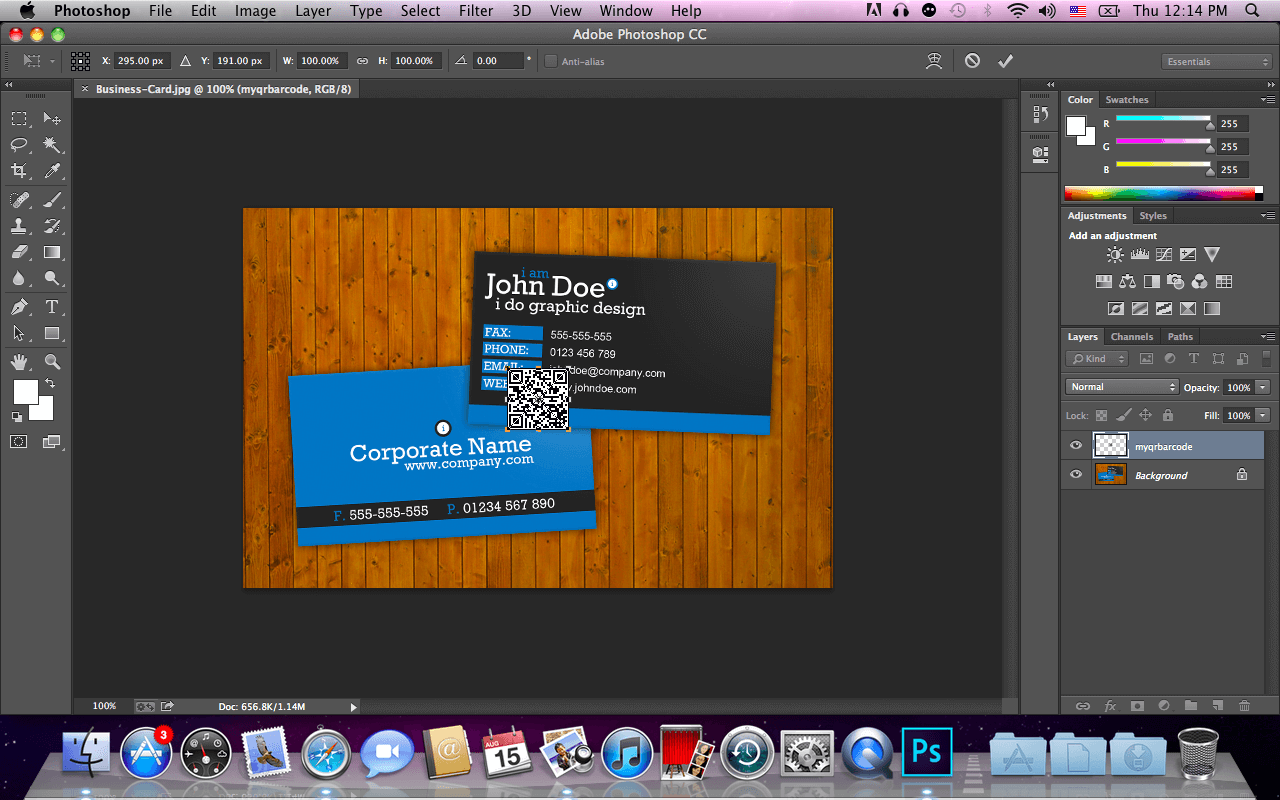
The QR barcode is inserted.
6. For example I decided to resize it, rotate it a little bit and place it on the right side of the business card.
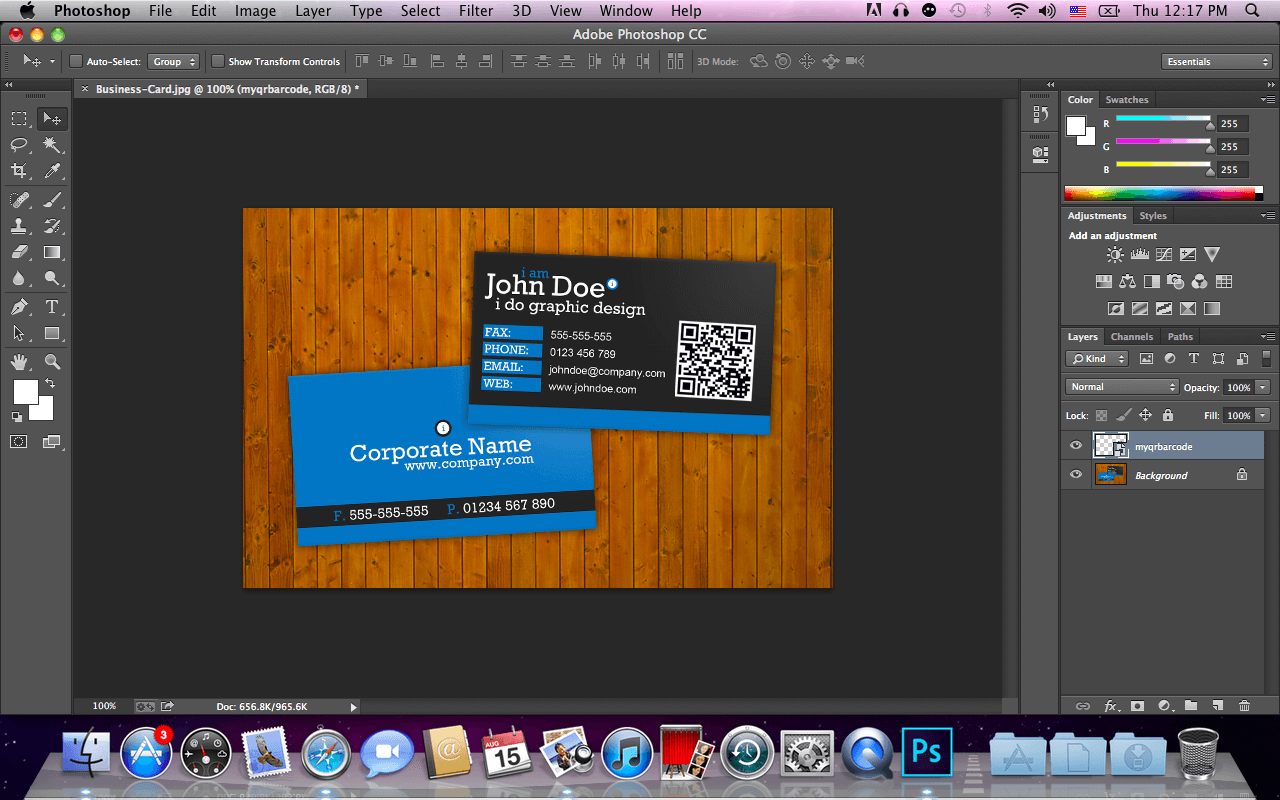
Your new business card is ready!
So this is how you can use Photoshop CC and QREncoder (QREncoderPro) together in your work. I hope this tutorial was helpful for you and now everything is clear. If you have some question or you want to share your opinion, feel free to do so on our social medias or simply in the comment section below.